|
To create your own AutoText entry, you need to follow these steps:
- In your ordinary Word document, type in the text you wish to include in your AutoText entry
For example:

- Select the text (highlight it). If you wish to include any paragraph formatting contained in the text, (eg line spacing, alignment, ruler settings), then make sure you also select the invisible paragraph mark at the end of the text. You might find it useful to select the Show/Hide button to make this paragraph mark visible.
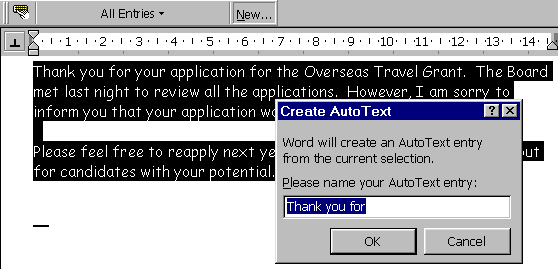
- Click the NEW button on the AutoText toolbar, and the following box will pop up:

- You will then be asked to give a NAME to this AutoText. Choose a short, descriptive name which you will easily remember when you want the full text to appear.
- To activate the autotext, simply begin typing your AutoText
name. As soon as Word recognises the name, it will offer you an
‘AutoComplete Tip' which pops up on the screen a snippet of the text for
easy identification. If you wish to have Word insert the entire
AutoText entry, hit the ENTER key (or hit F3). If you do not wish to use this AutoText, continue typing as usual.
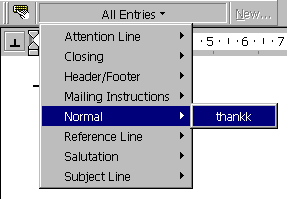
So, if you had chosen the work ‘thankk' as the name of the autotext in the above example, you would see the following:

HINT: To minimise ‘false alarms', do not select common words as AutoText entries, since every time you type that word, Word will think you are trying to invoke the AutoText associated with the word.
- Finally, since your AutoText entry has been added to Word's
preprepared list of entries, you may simply select it from that
list. All your own AutoText entries will appear in the category
‘Normal'.
 |